All posts tagged HowTo
A simple project as we all gear up for the holidays is a gingerbread book. Make this book and you’ll be ready to write a story in it, do drawings in it or tape in photographs of your gingerbread house making party. This book is made using the fabulous new Your Story Photo machine.
For the complete tutorial click here:Â Gingerbread House Book Enjoy and happy crafting!
It is Hello Kitty’s birthday this month and what better way to celebrate then to craft up something pink and saccharin sweet. Ms. Kitty’s founder, Sanrio, is celebrating its 50th anniversary with Small Gift — a tour complete with a pop up shop. Look for this today on Mill Avenue (in front of American Apparel) from 11 a.m. to 7 p.m..
Join the party and toast to Kitty’s birthday wearing a very Hello Kitty neon pink, side-angled bow. You can go online or to the pop up shop and buy a headband bow for $30 but this Thrifty Maker is after the look with out spending the dough.
To see the How To for this bow headband jump on over to Phoenix New Times Jackalope Ranch:Â A Hello Kitty Birthday Bow
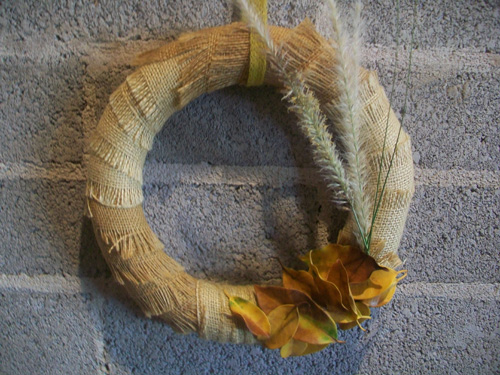
I made a wreath for fall. I have been wanting to do a project with burlap for a while now – so here it is.
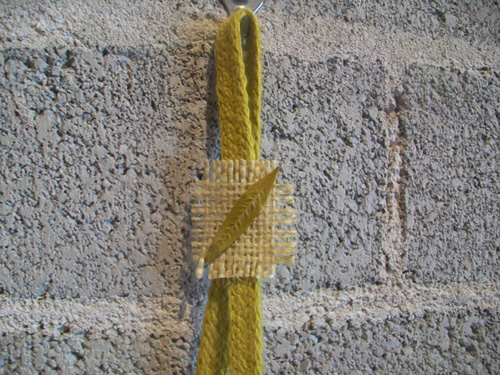
I bought a green Styrofoam wreath blank at a dollar store. Next, I cut two inch strips of two different color burlap, fraying the edges to allow for a hay looking quality. I wrapped and glue in alternating colors. I then glued on leaves from the yard and a couple pieces of fountain grass. To finish it off I attached an ocher yellow ribbon with a small piece of frayed burlap and another small leaf.
I have been working a lot porcelain ceramics this past month. My collection of Cuttlebug Embossing folders is the the perfect match for clay jewelry.
To make this I used Coleman porcelain and cone 06 glazes in a mini electric kiln that plugs into a regular 110 outlet in your home. FYI – you could also easily make this necklace by using Sculpey or Fimo.
Here’s how to do it:
1. Ready the clay by kneading it a bit to soften it. Roll it into a ball.
2. Place the ball of clay on top of the embossing folder of your choice. To make this key I used the Cuttlebug Vintage Collage embossing folder. Press the clay by hand on to the embossing folder until flat, with the palm of your hand about a 1/4 inch thick. If you want your piece to be a necklace make a hole now using a straw.
3. Lift the clay and place it off to the side on a piece of parchment paper. Now cut around the shape, with a craft knife, removing excess and overflow pieces of clay to get the shape you desire. Smooth edges with a small amount of water if needed. NOTE: Never use too much water when working with clay because it will just melt and fall apart.
4. Repeat the method in numbers 1 and 2 to make as many pieces as you are interested in making.
5. Once all of the pieces are made transfer them to a board or tray covered in newspaper. With all the pieces resting on top of the newspaper, cover the entire thing in dry cleaner plastic for several days so that the pieces dry slowly. NOTE: drying ceramics too quickly will cause them to crack.
6. Remove the plastic and allow them to dry for another day or two. NOTE: Never put wet ceramics into a kiln they will just blow into pieces.
7. Place the dry ceramics (called greenware) onto kiln shelves and/or kiln furniture
8. Close the lid, set the dials according to the manufacturers directions, place the firing cone and let it run it’s course for 24 hours.
9. Once it is completely cool, open the kiln. Some popping and pinging noises will occur – this is normal. Your pieces will now be “bisqued” – this means fired pottery that is unglazed. Pull them out and set them on a table .
10. Pull out your glaze colors and a small paint brush. Cover the pieces in the glazes. Once the glazes are dry coat them all over with a clear glaze if you want them to come out shiny.
11. To glaze fire repeat steps 7, 8 and 9.
12. Now use string, yarn and t-shirt yarn braided together to make the necklace “chain” part of your piece, tie it at the top with long enough strings so it slips over the head.
Give, wear and enjoy! Happy crafting xoxo Lovely Lula
I created this black bird covered branch in the Halloween Spirit but if the colors were changed it could be used any time of the year as a great decoration.
Directions to make this project:
1. Get a small tree branch from you neighborhood. Lay it out on top of newspaper.
2. Spray paint the entire thing, allowing for drying time in between coats. For this project I used a metallic flat black.
3. Once dry, place the base of the branch into a glass vase. Fill the vase with a weighted item of your choice. For my project I used yellow popcorn kernels.
4. Next, using your Cricut, black card stock and any of the Halloween cartridges cut out birds in all different sizes from 1 inch to 5 inches. The Halloween cartridges include: Happy Hauntings, October 31st and Pumpkin Carving.
5. Peel the birds off of the Cricut sticky mat, place them all over the branch and back them with standard scotch tape to hold them in place.
6. For a final touch and to add a little bling, paint a wing on using glitter.
Happy Halloween and Happy Crafting xoxo Lovely Lula


