Ideas For Home

I love Halloween. I always have and I think it is because it doesn’t require stressful family time, it is all about dressing up and acting like a character. Orange is also my favorite color so that gives and edge to the holiday for me. I am going to start posting several new Halloween projects but I thought I’d take a minute to kick off the 2011 season by revisiting Halloween projects from last year. Click HERE to see some great ideas from 2010.

Happy crafting xoxo Follow me on Twitter I am Lab5 and on the Lovely Lula Facebook Page.

This week I took a boring, old, white mirror and treated it with silver leaf, mounted it to the wall and the painted a silver boarder around the outside. To finish it off I used my Cricut to cut Bazzill Basics Gun Powder Grey Glitter Paper shapes using the Accent Essentials Cartridge. I then attached the shapes to the silver painted frame on the wall with Aleene’s Tacky Tape.


Happy crafting xoxo Follow me on Twitter I am Lab5 and on the Lovely Lula Facebook Page.
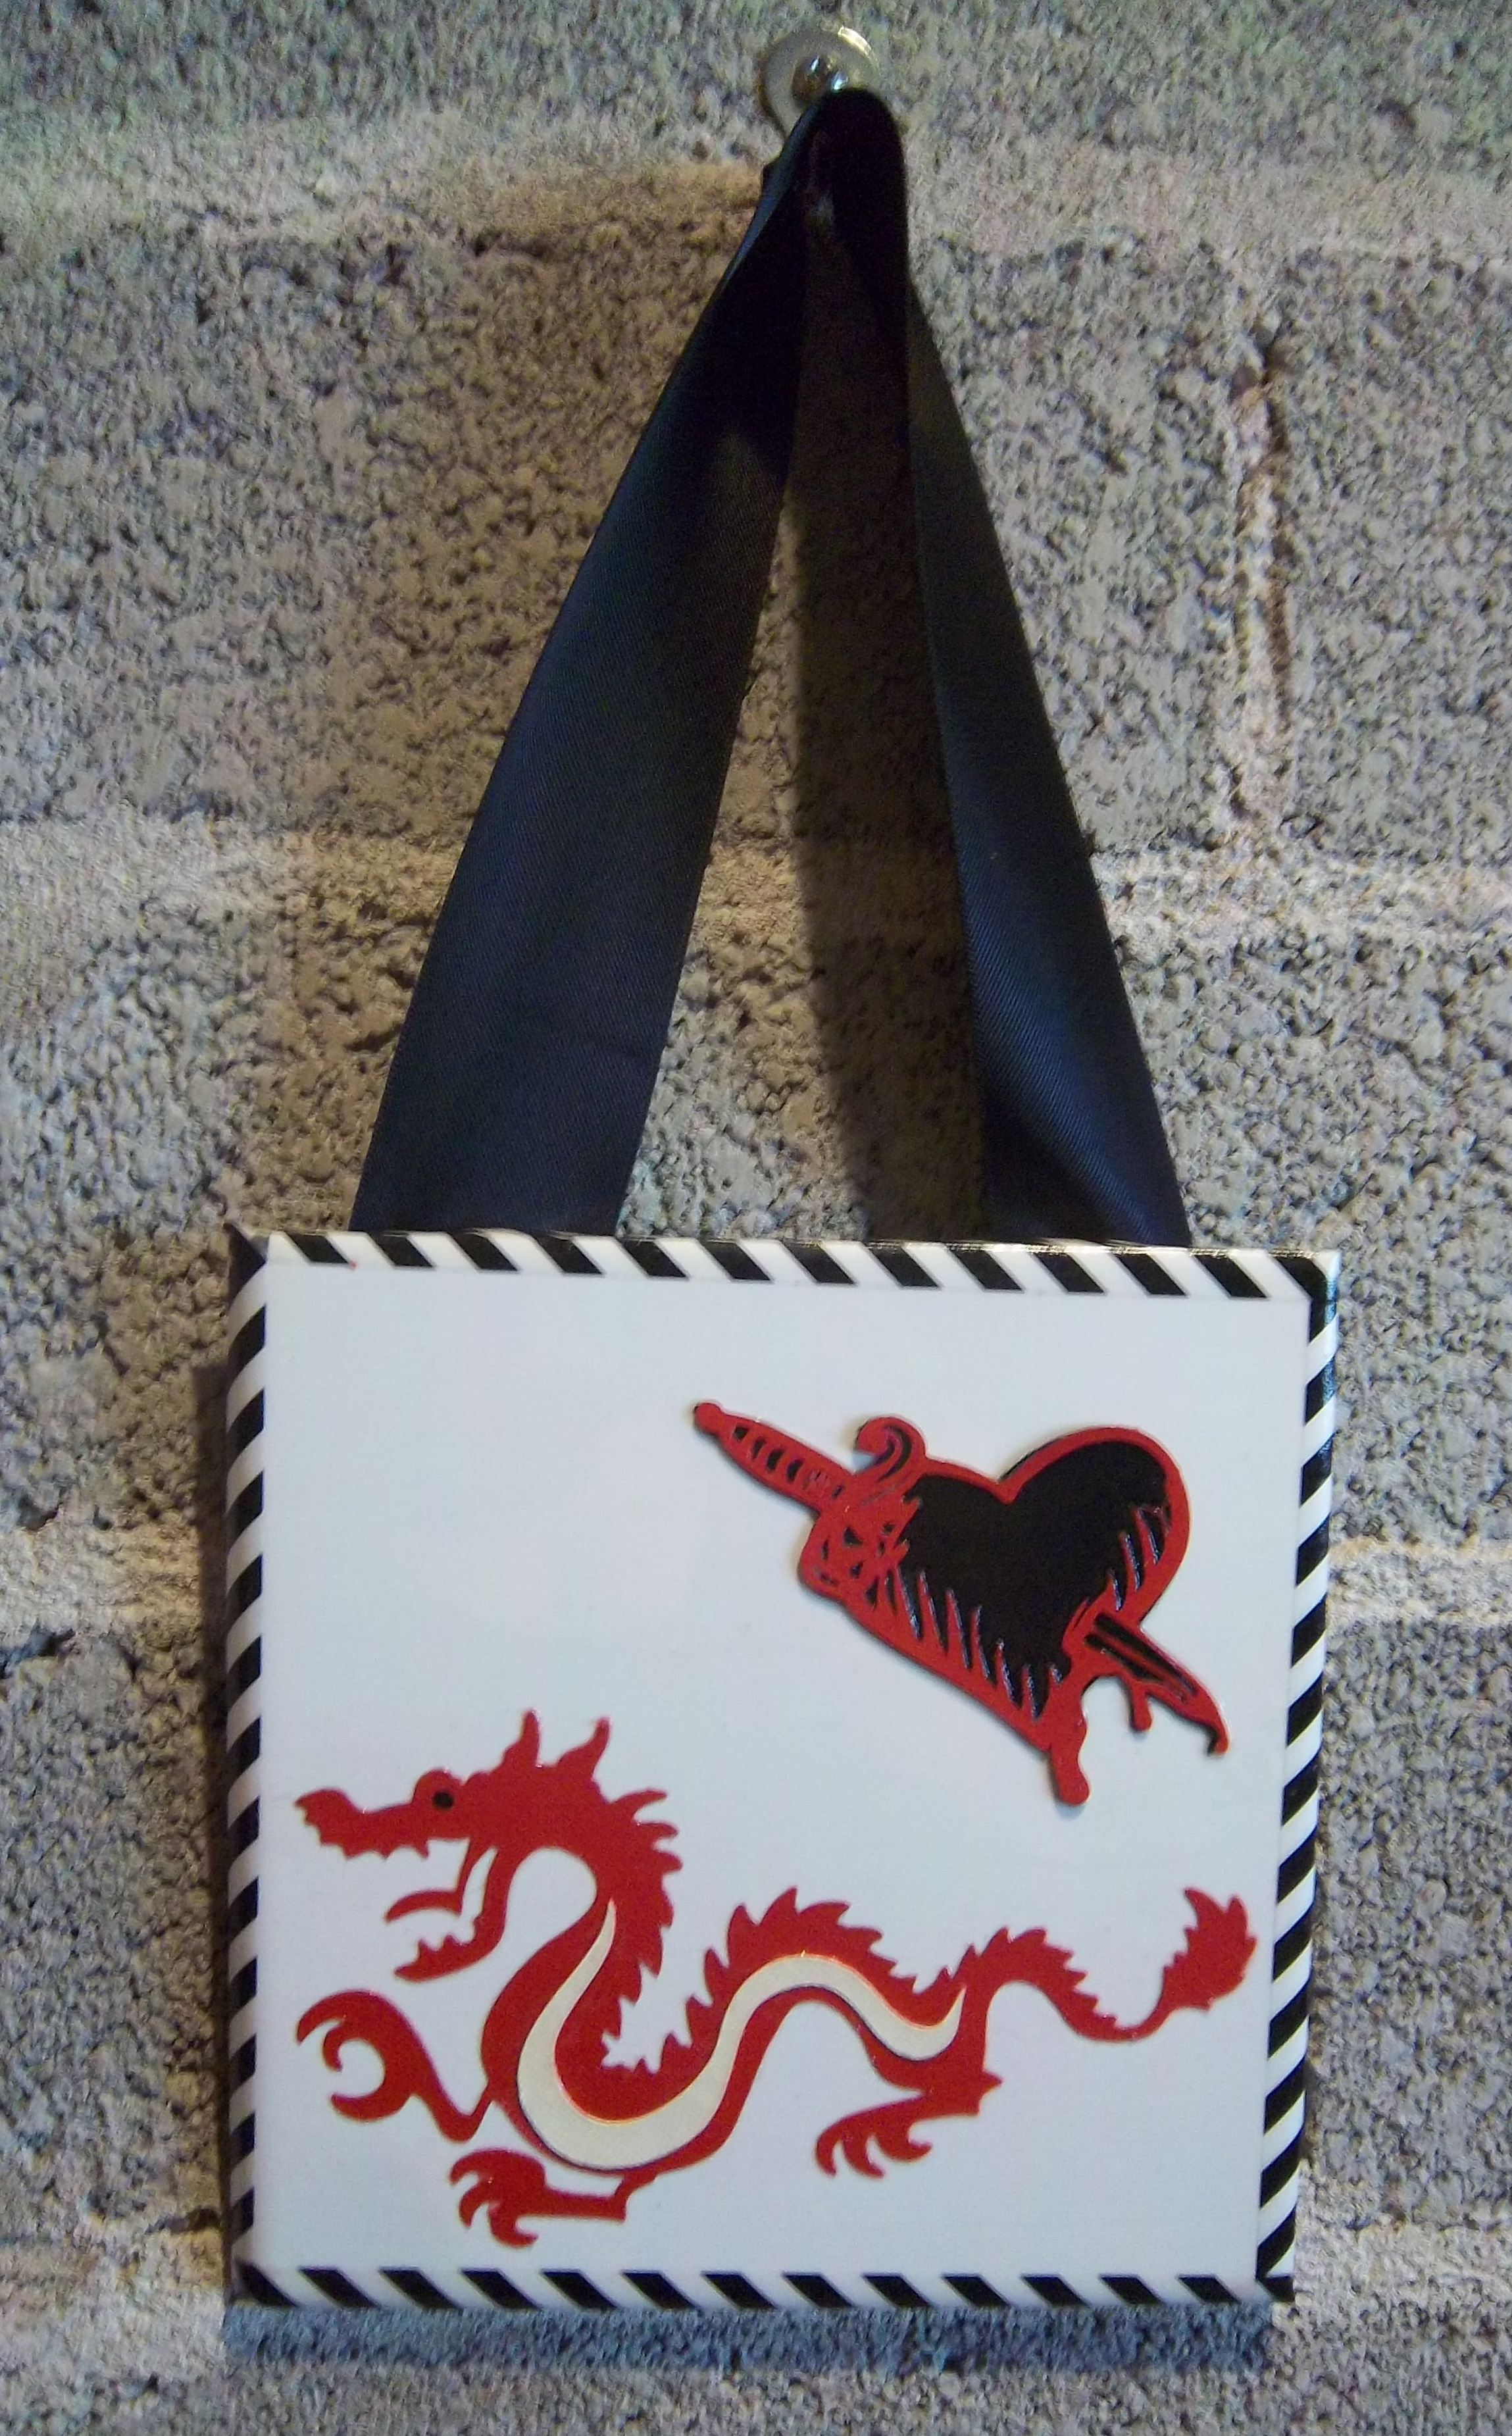
I wanted to share the project I made using the Spring Fever Holiday Cartridge that comes with the Cricut Expression 2 bundle. I was inspired by this cart to create a tween themed wall tile. I love YA books and read them all. So for this design I used the bleeding heart tattoo looking cut to represent The Twilight Series and the dragon to represent the Millennium / Girl with the Dragon Tattoo Series. I am forever a tween myself and love celebrating a good read!

Happy crafting xoxo. Follow me on Twitter I am Lab5 and on the Lovely Lula Facebook page.
The DVR is killing me. I record everything now. Feeling a little spoiled when I go to watch a show and can’t fast forward through commercials because it isn’t recorded and HGTV is my obsession. If the short people don’t interrupt and ask for a show of their own. I often watch Design on a Dime and mock a little because really some of their projects are just ugly. So I thought why not show a simple way to make a painting for your bare walls that is fun and functional and not splatter paint!
I took an inexpensive canvas from the art supply store and treated it with layers to make a great piece of art.

1. I started by painting the canvas all one color using acrylic paint, allow it to dry fully.
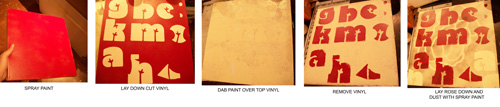
2. I spray painted a loose spotty paint over top in a contrasting color.
3. I used my Cricut to cut letters out of sticker vinyl (in this case I used Birds on Parade Cartridge) I laid those letter down on top of the canvas and dabbed a third color of paint over top, this time a lighter color, covering the letters, I allowed this to dry and then peeled the letters off to revel the color underneath.
4. I then used the YUDU to screen printed several sheets of card stock using a hand drawn patterns. I used those screen printed sheets to cut a large rose shape on the Cricut using the Sophie Cartridge, which is a Cricut Circle exclusive.
5. I flipped the rose shape upside down and lightly spray painted a dusting of black onto the canvas.
6. I flipped the rose over with the screen printing facing out and I added a few pieces of the vinyl that had been removed, to different areas on the canvas.
7. Finally I used shellac to hold the whole thing in place.
Allow to dry and you are done with a great piece of art to hang on your wall!


Happy crafting xoxo. Follow me on Twitter I am Lab5 and on Face Book under the Lovely Lula page.

HOMEMADE BAKED POTATO CHIPS
INGREDIENTS
- Cooking oil spray canola
- 2 medium potatoes about 1 pound
- Salt to taste
- Preheat oven to 375°
- Line two large baking sheets with tin foil
- Spray foil with oil, use a paper towel to spread over the bottom
- Scrub potatoes
- Slice the potatoes crosswise, about 1/8-inch thick
- Place potatoes on the baking sheets in one layer
- Spray the tops lightly with the oil
- Place in oven on two racks and bake, switching racks halfway through, until brown and crispy, about 30 minutes. NOTE:Some of the slices will brown more quickly than others, depending on thickness. When that happens, just remove them and continue baking the others.)
- Remove the chips from the pans and place on paper towels. Add salt while still warm
10. Served immediately