All posts tagged Cricut
I used the Imagine Cartridge called Santas Village to create this project. I like the Abominable snow monster type character available on this cartridge, the odd little bunny that looks like it has to pee and the penguin that looks lost our in the snow.
I paired this with a very cool paper called Lazertran Inkjet Waterslide Decal Paper. You can print right onto this paper using your Imagine or any color printer or color copier.
The next step is to cut around the image you want to use, dip it into a bowl of water and the decal front peels away from the paper backing. You can then place the decal onto any ceramic surface and once it drys it is attached. So I used this method to create three cool ceramic wall tiles.
I also added Japanese Washi Tape at the bottom and sealed the whole tile with a clear acrylic varnish. This really gets me excited for Christmas decorating.
I used Scandinavian Christmas Cards Cartridge to create a Scandinavian Christmas Tree Skirt. I used my Cricut and the Scandinavian Christmas Cards Cartridge to cut fabric, that I back with heat and bond. I changed the direction of the reindeer so that I had one facing left and one facing right and in the center I place the holiday tree. I ironed it on to a large piece of ochre yellow wool felt that I cut into two half rounds and sewed together, it closes with pieces of velcro. I finished it off by adding green cotton ribbon to the edge and a few bows. Now I just need all my holiday goodies down from the attic. Where’s the ladder?!
Happy crafting xoxo Follow me on Twitter I am Lab5
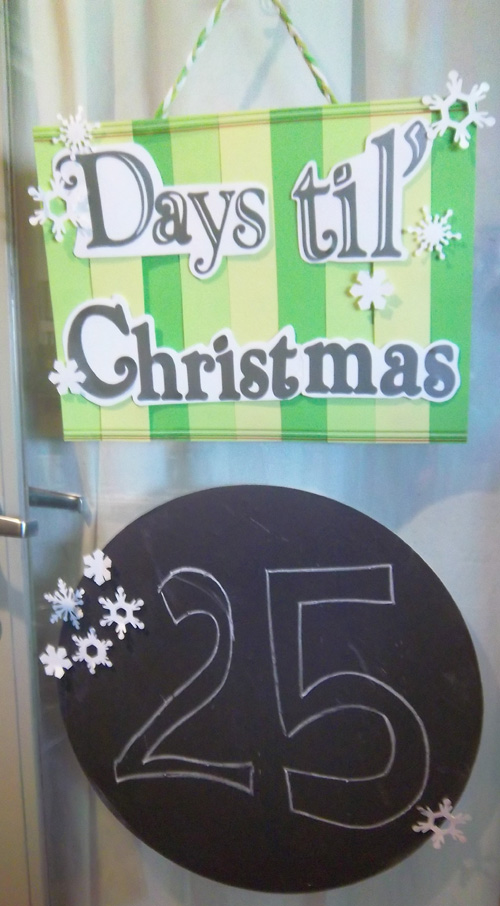
I know I should be putting up a post about Thanksgiving this week but I am just so excited about Christmas this year I am just gonna skip right on over it and get the countdown going! I created the “Days til’ Christmas” sign using the Winter Frolic Cartridge for the font out of silver vinyl and Winter Lace cartridge for the snow flakes out of white paper. The stripes of green paper and the white snow flakes are all Bazzill Basics.
The area to write the days on is a large circle of chalk board vinyl and we’ll count the days down with chalk.
Happy crafting xoxo. Follow me on Twitter I am Lab5 and on the Lovely Lula Facebook Page
I married the idea of affordable art with Thanksgiving. A few weeks ago when I created this Fall wreath I over printed onto the canvas with the YUDU screen I had prepared using the Simply Scarecrow Cartridge. I cut the leaves out that were in good shape and then with the rest of the canvas I tore it into strips and set it aside. So always save those scraps you can put them to good use later.
I used an inexpensive canvas that I picked up at the craft supply store as the base. I first painted it red with acrylic paint, then I used painters tape to tape off lines and I spray painted orange over top of that, once dry I peeled the tape off. Next I wrapped the painted canvas with the printed, torn strips and stapled them to the back. To hold them down I coated the piece with shellac. Once the canvas was dry, I glued the leaves down down to the surface. Finally, I used the Autumn Celebrations Cartridge and cut the word “thankful” out of gold vinyl and attached that to the piece. Now I have a fun, affordable piece of art for Thanksgiving.
Happy crafting xoxo
Follow me on Twitter I am Lab5 and on the Lovely Lula Facebook Page
Happy Halloween! I used my Cricut Cake machine and a stack of round tortilla shells to cut Halloween shapes. I then placed the cut shapes onto a baking pan, salted them and then baked them into chips. I love this idea and will do it with other shapes for other upcoming holidays. For Halloween shapes use the October 31st Cartridge.
Happy crafting and Happy Halloween xoxo
Follow me on Twitter I am Lab5 and friend me on the Lovely Lula Facebook Page


